Gif Headers How-To

Hola, my lovely alphas!

It’s XOXOAliciaHeartsYou here with a new makeover tutorial that multiple people have been asking for.  I’m finally writing on BAA about how to make simple gif headers!  Now usually with tutorials, we include step-by-step pictures…however since each step has multiple tasks in this tutorial, I’ve created youtube videos for each step instead of pictures.  I hope the videos work for each of you – if not, feel free to comment below or email/aim me and I can email you the videos or the links to the videos.  Without further delay, here is the tutorial on simple gif headers!

~~

So the first step is to find a gif of your FC that has a solid color on the side of it and save it to your computer.  Here are a few examples of gifs (using my FC of Nina Dobrev) that have solid colors on the side. I’ll be using the last of the four examples for the rest of the tutorial:

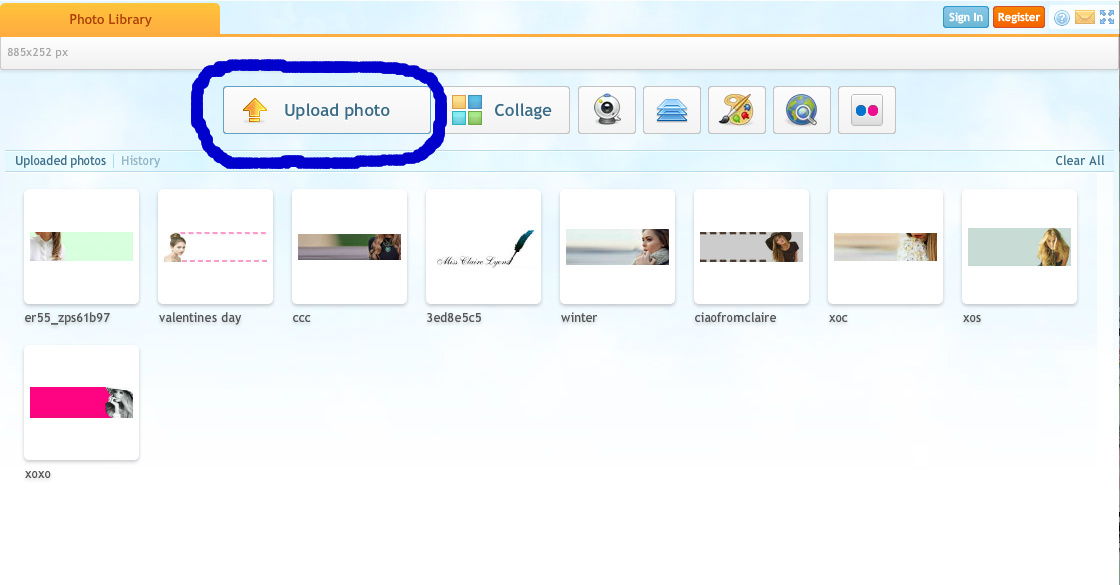
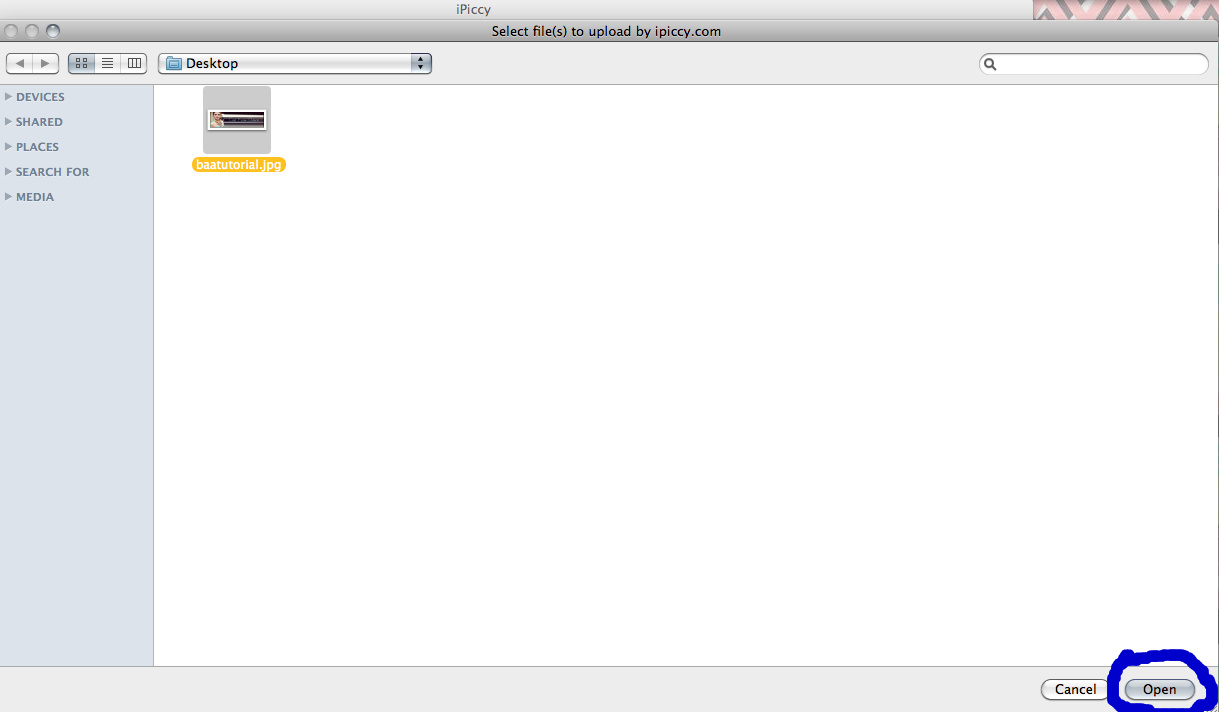
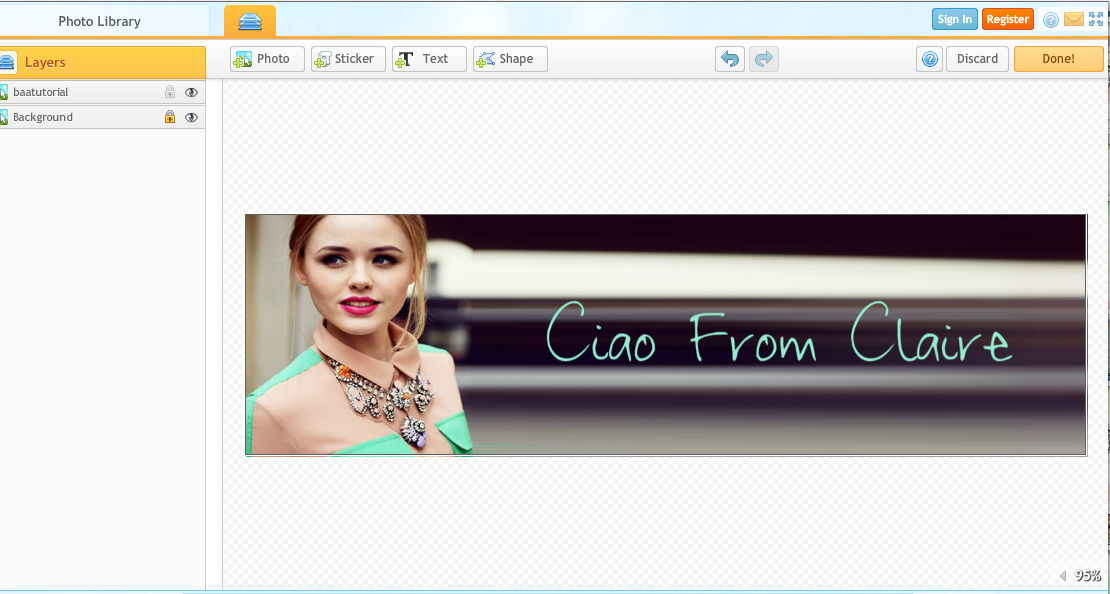
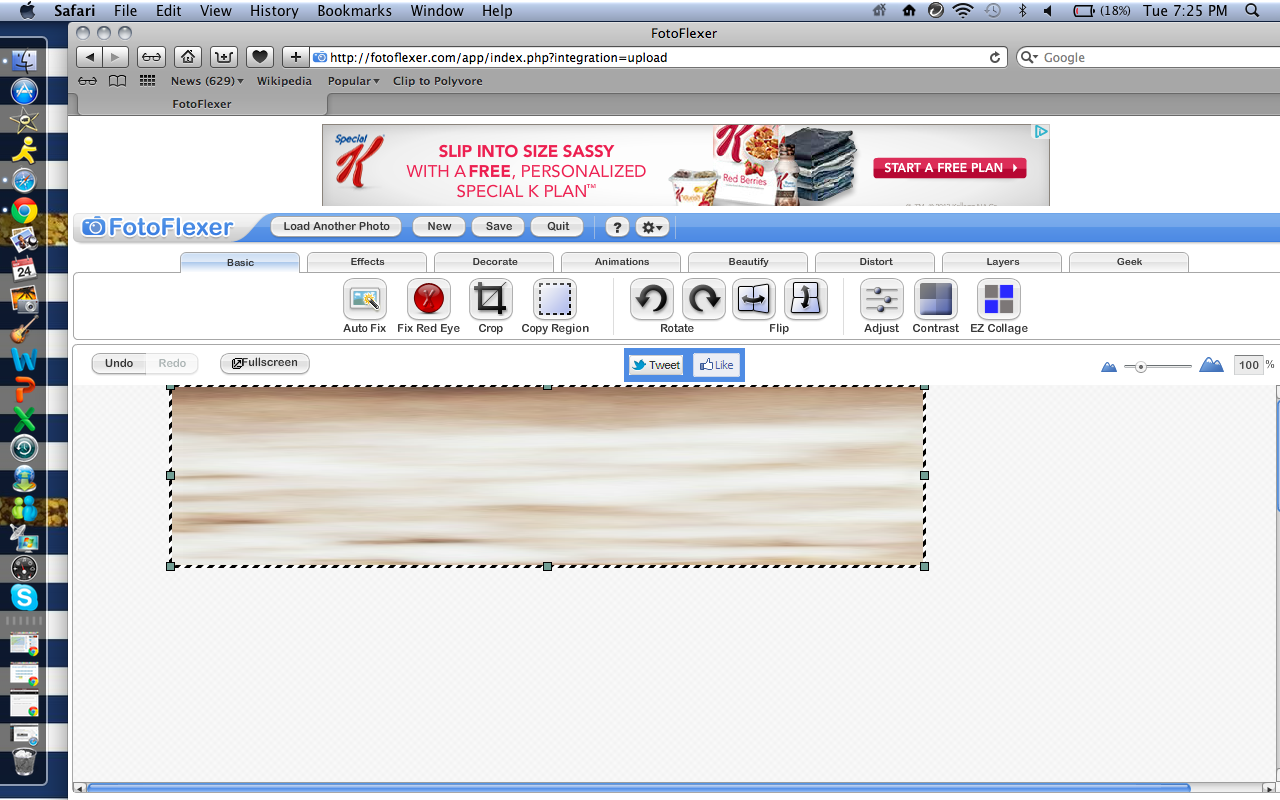
Step 2: Next, go to ipiccy.com and make a plain header (whatever size you need for your blog’s theme, I’m making mine 885 x 252 for the Forever theme) out of only the solid color that’s on the side of the gif.  To do that, first click “Upload photo” and choose the gif that you saved to your computer.  Then click “more”, “new image”, enter the size of the header, and click “create”.  Add your gif to the blank header canvas as an image, drag the corners of it to enlarge it, then click either the check mark or the tab with layers of papers to save it.  Doing this just helps to make it easier to match the color of the solid color in this next step.  Now, click on the paint palette tab, use the eyedropper tool to correctly identify the exact shade of the solid color, and paint the whole header canvas that color.  Lastly, click “save painting”, then click the “save” tab that has a floppy-disk logo on it, and save the image to your computer.

**Note – From here, you have two choices: you can open LunaPic and use it’s “Blend Two Images” option or continue the way I’m going to show you.  The only reason I’m choosing the following way is because LunaPic sometimes makes the gif fuzzy once it’s blended onto the header and trying to fix that can be a bit frustrating.

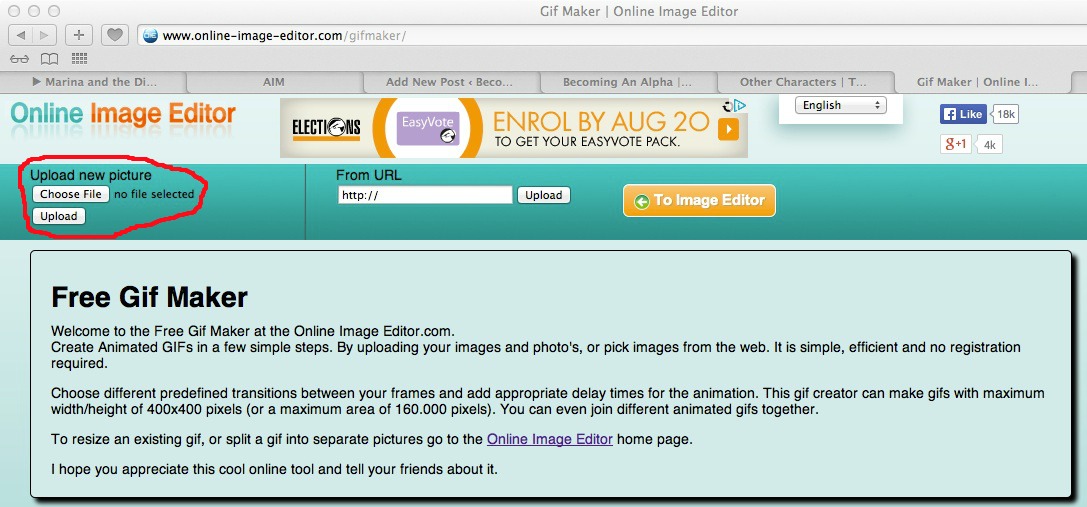
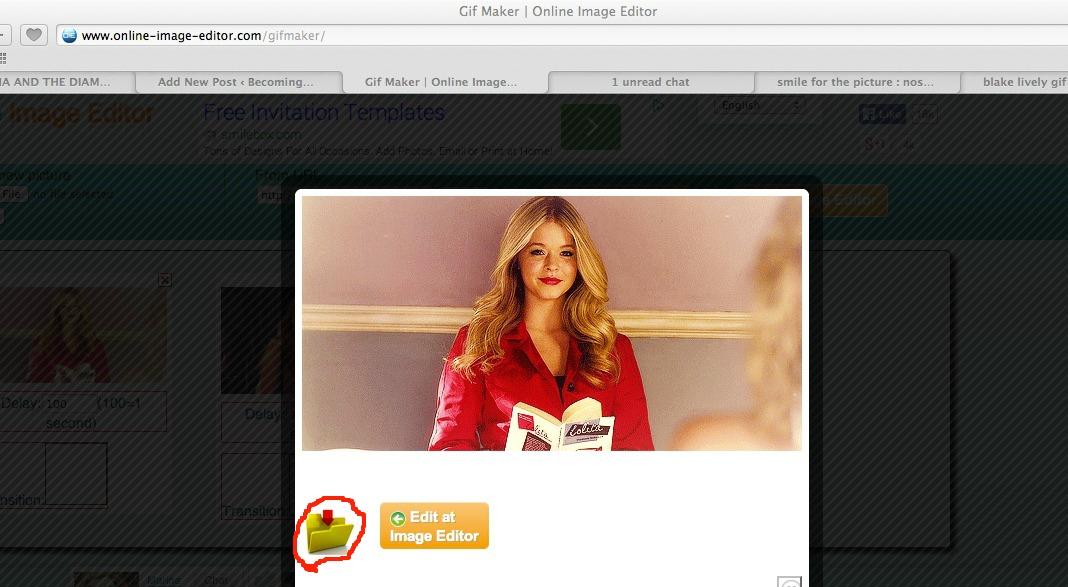
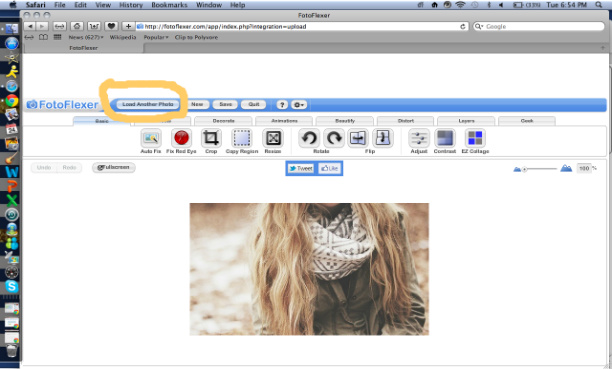
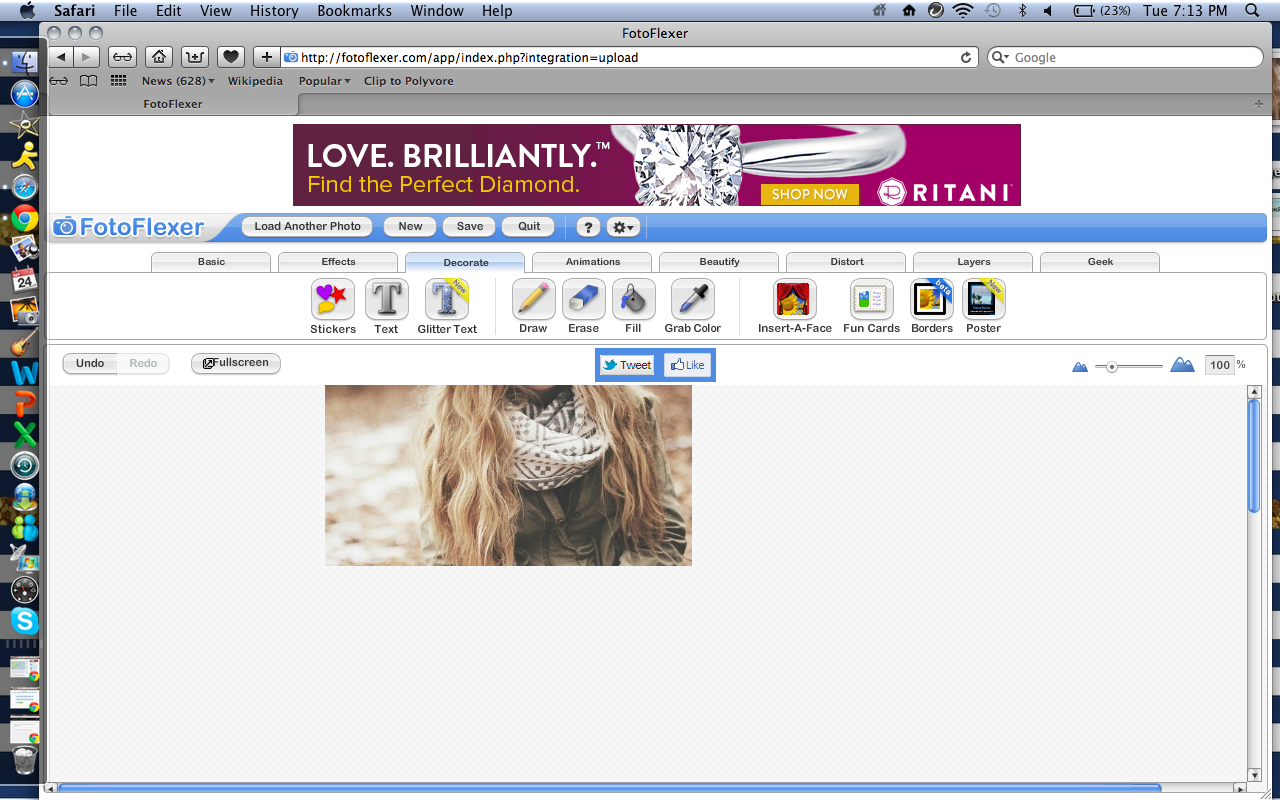
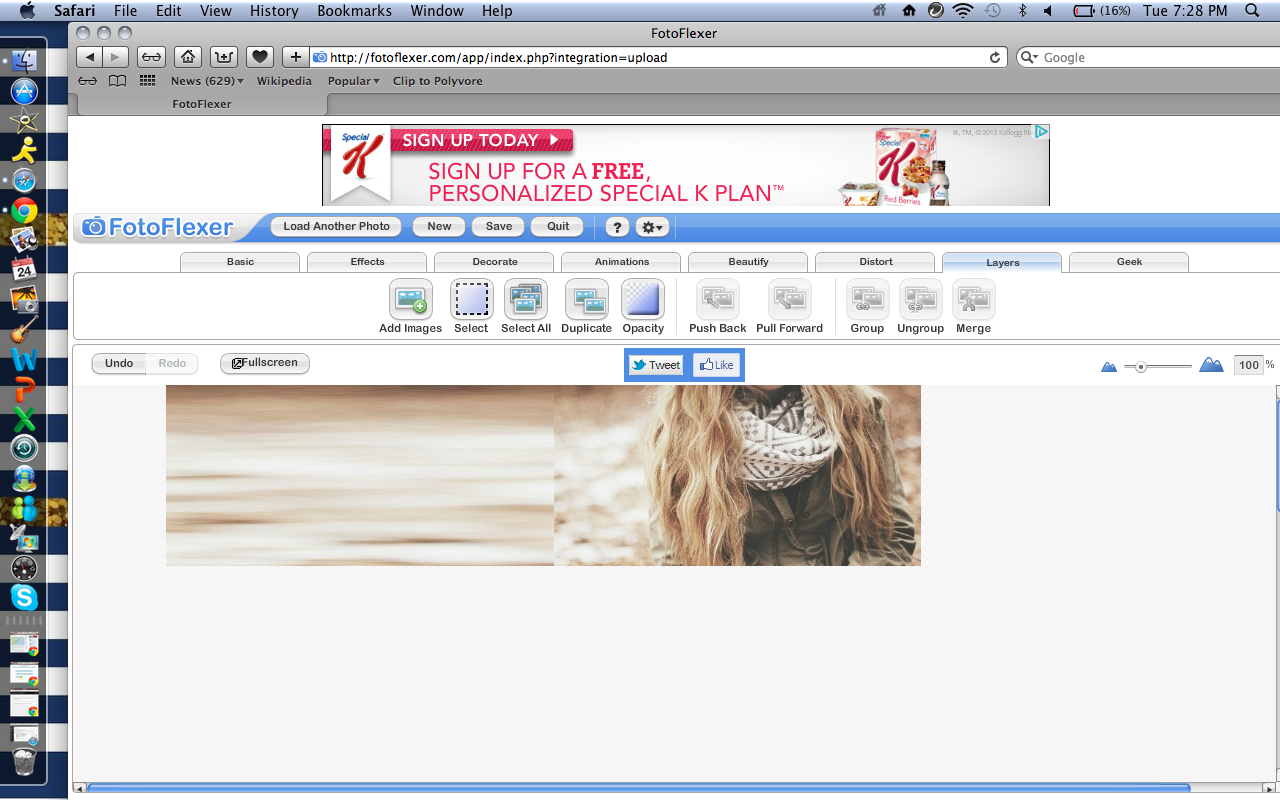
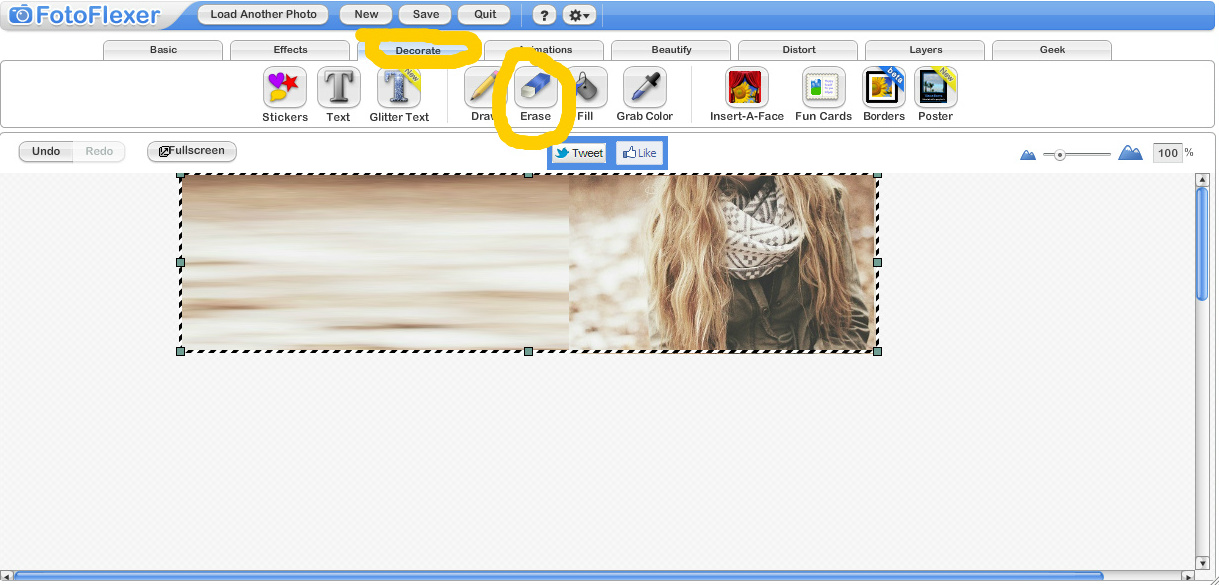
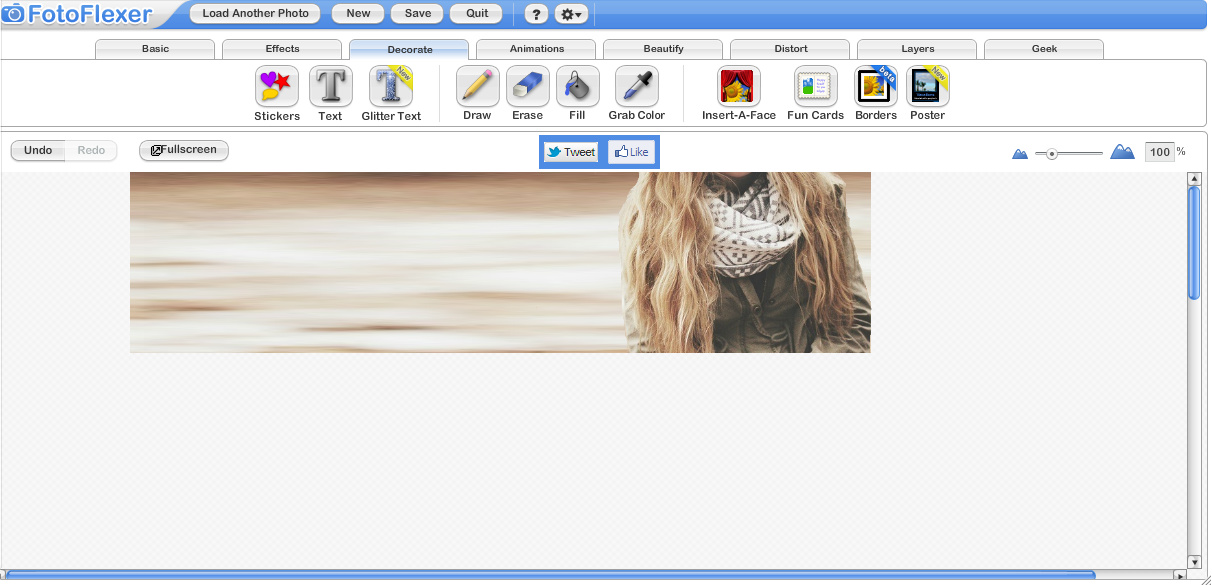
Step 3:  Now, go to http://www.online-image-editor.com and upload the solid color header.  After you upload the solid colored header, you’ll see a row of editing options with 3 tabs above them labeled: Basics, Wizards, 2013.  Click on the “Wizards” tab and a new row of editing options will appear.  The 5th option from the left is “Overlay image”…click on that.  An “Overlay image” box will appear to the left of the header canvas and will give you the option to upload an image. The image you need to upload is the gif you want in your header. Choose the gif file, click upload, and then a few seconds later the gif will appear on the canvas.  Once it appears, you have the options to rotate and/or resize the gif using slider bars on the left and you can move the gif to wherever you want it to be. Once you move it to where you want it to be and resize it if needed, click “Apply”.  The screen will darken and the gif will disappear for a few seconds but then reappear where you placed it.  Now you need to save the gif header to your computer by clicking the “Save” button.  In the video, I had to right-click the header, open it in a new safari tab, and right-click to save it because my screen freezes when I try to click the “save” button.

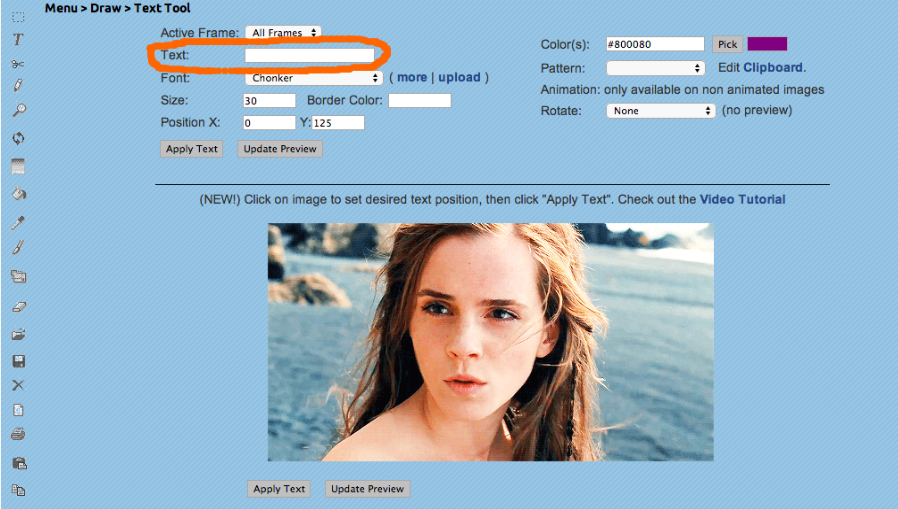
Step 4:  All that’s left to add to the header is the text you want.  The easiest way I’ve found to add text to the gif header is through LunaPic.com.  It is possible to add text through Preview if you own a Mac Computer, but you have to add the text per frame and is not as simple.  So now go to LunaPic.com, click “Browse, and upload the text-less gif header.  Once it appears on the screen, click “Add text” above it and it’ll take you to a new screen.  First, choose a font.  You can either choose one of theirs or upload your own.  I opted to upload my own in the video.  Then choose the text color you want and type what you want the text to say in the “Text:” box. Then choose a text size and move the text to where you want it to be on the header.  Once you have the text how you want it to be, click “Apply Text”.  After LunaPic processes the image, scroll down to near the bottom of the screen and next to “Save to:” click “your computer”…the gif header should save to your computer’s downloads.  Voila!

Step 5: Now just add the gif header to your blog.  Just a warning…if you try to use WordPress’s option to crop the gif header while adding it to your blog, the gif will not move.  In order for the gif header to move while up on your blog, you have to click “Skip Cropping, Publish Image As Is”.

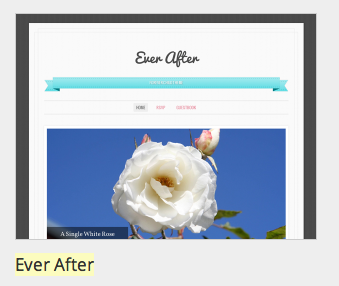
There you have it! The finished product after following these steps!

imageedit_2_4955082852

(It looks a bit pixelated but that’s only because it’s in a post and was resized to be smaller.)

~~

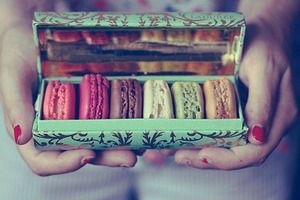
I hope you’re all excited that there’s finally a gif header tutorial up, but don’t forget to also check out our Alpha In Training for this month, too: MacaroonsAndMarcJacobs!

xoxo, Leesh

Crackship Addiction

Hey everyone! It’s Giselle Dubois (TSOGD) This is my first post on BAA.

Isn’t it annoying when you have an amazing Face Claim but you don’t have any gifs or pictures with anyone in your clique. And no matter how hard you try you just can’t seem to find any crackships of them. This is a guide to help you make your own crackships.

Step 1: Finding GIFs. Some good places to look are tumblr or google images. I chose a gif of my face claim (Sasha Pieterse) and KGTW’s face claim (Blake Lively). It’s best to find gifs that are the same size and shape. I accidentally used two gifs that aren’t the same but it looks nicer if the gifs are exactly the same size.

tumblr_mb8pg0y0tp1rwrtxf_largetumblr_md0w19G1rm1qmhsmu

Step 2: Go to online-image-editor.com. This site is free and you don’t have to sign up for it.

Step 3:

BAA1 edited

A page like this should come up. Click where it says GIF Maker (In the red circle).

Step 4:

BAA2 edited

Click “choose file” and select one of the gifs you would like to use. Then click upload. It may take a while to load. When your first gif has uploaded repeat this step. Don’t worry about what order you upload them in, you can drag the gifs around and change the order.

Step 5:

BAA3 edited

When both your gifs are uploaded and you’re satisfied with the order, click “create animation”. Again this might take a little while to load.

Step 6:

 BAA4 edited

Click the file icon (in the red circle) and the gif will be downloaded. Also you can use the traditional way, right click and save or drag and drop.

Step 7:

oie_animation-2

Enjoy your finished crackship!

-Giselle

August AIT:

img-thing

Macaroons And Marc Jacobs

LunaPic Tutorial

Post From Kristen here with another post on BAA!

A popular form of media on wordpress has always been GIFs. For those of you that don’t know what a GIF is, it’s an animated picture. Many bloggers use GIFs to decorate pages that show the members of their clique and in their widgets. This tutorial will show you how to edit GIFs with a software called LunaPic.

Step 1: Find a GIF you want to edit

For this tutorial I will be using a GIF of my face-claim Emma Watson.

Step 2: Go to LunaPic

LunaPic is a website that I believe is available on all devices. The site is completely free and very easy to use. To start using LunaPic just go to lunapic.com

Step 3: Upload your GIF by going to ‘Browse’ and choosing the image you would like to edit.

Screen Shot 2014-06-19 at 7.04.47 PM

Step 4: Once you have uploaded a picture go to the ‘Draw’ option

Screen Shot 2014-06-19 at 7.14.17 PM

Step 5: Decide what message you want to put on your GIF by writing it into the empty ‘Text’ box.

Screen Shot 2014-06-19 at 7.22.16 PM

Step 6: Once you have decided what you want to write on your GIF, choose a font. For this tutorial I will simply be decorating my GIF with ‘PostFromKristen’ in the font called Scriptina.

Step 7: The text will show up in the middle of your picture in purple. Drag your text to wherever you want it to be in the GIF.

Step 8: If you want, change the color of your text by clicking ‘Pick’

Screen Shot 2014-06-19 at 7.31.30 PM

Step 9: If you like how your GIF looks click ‘Apply Text’

Screen Shot 2014-06-19 at 7.36.00 PM

Step 10: Scroll to the bottom of the page and decide where you want to save your image. I decided to save it to ‘My Computer’

Screen Shot 2014-06-19 at 7.42.42 PM

Step 11: Once you have saved it to your computer, it should show up on your desktop. My finished product was:

imageedit_2_9960449770

Announcements:

Congrats to everyone who competed in the 2014 WPAs.

We have added new members to BAA. See the Girls Here To Help page

 I have a new blog: Margot Owens

This Month’s AIT:

Angel With An Ember Heart

Angel With An Ember Heart

The Importance of Blog Widgets

coffee shop brunette

Hello there my lovelies!

XOXOAHY here, back with another blog tip to make your blogs better than they already are!  As the title points out, this specific post will give a few pointers about your blog’s sidebar and footer widgets.

Now sidebar widgets aren’t really something bloggers think to much about when putting up a new makeover or when making changes to their blogs, except maybe when they change the gif or picture in their sidebar.  Granted, they aren’t the most important things in a blog makeover, but they still shouldn’t be overlooked.  Widgets are kind of like the bow that gets wrapped around a present…they tie everything together.

If you look around on other peoples’ blogs, you’re most likely to see the widgets on the right or left sides of the blog.  However there are options to have the widgets in other places such as the footer of the blog.  Don’t be afraid of changing it!  Another thing that can be changed and mixed up is the order of the widgets on your blog.  The most common thing to see in a sidebar is: Image, text, follow button, blog stats.  Maybe every once in a while that could be changed?! Make the image widget the last in the row…make the blog stats the first in the row…add a new kind of widget such as the ‘Twitter Timeline’ widget if you have a twitter account to match your blog or the calendar widget to show which days of the month you’ve posted on.

If you do use the image widget, don’t forget to make sure the image goes with your makeover!  You don’t want to have a picture of blooming flowers in a spring field if your makeover is beach and summer themed or have a black & white gif of your FC if your makeover is bright and colourful!

All in all, just don’t be afraid to shake it up and mix it up when it comes to your blog widgets.  Sometimes there’s too much of the same.  Change can be good!

This month’s AIT is OXMassieBlock!  Go check out her blog!

xoxo, Leesh

Removing Picture Borders

Pretty Spring Flowers

Hola chicas!

XOXOAliciaHeartsYou here to bring you all great news!  Wordpress has brought back the ability to remove picture borders! It even has a special option yet again to change the colour of the borders, too!  It’s different than it was before, though, so I’m here to let you all know how!

First, you insert your picture into your post or page like you usually would.  Then, click on your image and click on the icon that looks like a pen/pencil.

Step 1

An “Image Details” menu should pop up, like in the image below:

Screen Shot 2014-05-04 at 2.53.26 PM

Click on “Advanced Options” to bring down the more advanced menu and a new set of image options will be listed like this:

Screen Shot 2014-05-04 at 2.53.44 PM

Next to the words “Image Border” it gives a box for width and colour.  If you want to make a picture or gif borderless, then type the number 0 into the ‘width’ box and leave the ‘color’ box empty like so:

Screen Shot 2014-05-04 at 2.54.09 PM

Then click the blue “Update” box in the bottom right corner of the “Image Details” menu.  There you go! Once again we can have borderless images!

If you want to have an image with a thicker and colourful border, then enter a number into the ‘width’ box, the colour you want the border to be in the ‘color’ box, and then click the blue “Update” button like I did in the following example:

Screen Shot 2014-05-04 at 3.03.31 PM

Pretty Spring Flowers

~~

So there you have it!  So now those of you who changed blogs theme just to be able to use borderless pictures can go back to Forever and still have no borders or have colourful borders!  Hope this helps all of you! PS this example image is credited to JessicaHoldenPhotography.

This month’s AIT is OXMassieBlock!  Go check it out!

xoxo, Leesh

Get Your Measurements Right!

large

Hello dolls!

It’s CiaoFromClaire here to give you a tutorial on how to get your measurements of your header right!

Let’s get started!

♡♡

The first thing you will need is your header, of course. This header is one I made before I got the exact measurements for my blog’s theme, which is Forever.

baatutorial

The next thing you need to do is go on iPiccy, and upload your header.

baatu

baat

baatut

The next thing you have to do is click on the header, and when it’s blue, and next to the option where there is a camera, click “Create New Blend”.

It will then ask you for the measurements, and if you have the Forever theme, you will put 885 as the width, and 252 as the height! Once you have done that, click “Create!”.

baatuto

Your screen will look like blank canvas, with a rectangle that will later have your header!

The next thing you have to do is click “Photo” and click your header, then drag your header into the rectangle!

Your header will look small, but that’s okay.

baa2 baa1 baa4

Taking your mouse to the bottom right corner of your header, click it, and then drag it all the way out until it fits your rectangle. Make sure that your header is on the inside of the header, and not on the outside. (Your header will look blurry in the process of dragging it out, but it will be normal once you stop holding the mouse.)

finished

The finished product!

Now, all you have to do is save it! Click where it says “Done!” on the upper right corner, then click on the floppy disk.

save

Name your header, and then click “Save to my computer”. Your header will be saved on your desktop, and then you can go to your blog’s dashboard, and upload it on to your blog!

♡♡

I hope you guys enjoyed this tutorial, and make sure to get your header’s measurements right!

XOXO,

Claire.

Alpha In Training- Alicia on Pointe

Popular Blog Themes: Important Details to Know

Hey there, lovelies!

XOXOAliciaHeartsYou here with more blog tips that can and hopefully will help you out when planning makeovers and big changes to your wonderful blogs.  This post will be focused on the main details of the three most popular blog themes, as the title suggests, which are Forever, Pilcrow, and Ever After.  I’ve used two out of the three on my own blogs and I didn’t even know all of these details about them, so I hope you can learn a bit, too!

Continuing reading if you want to know more!

~♥~

So the first blog theme I’ll discuss is the oh-so-famous, Forever.  First of all, the header size is bigger than the other two themes I’ll be discussing, with a “Length x Height” of 885×252 pixels.  It has one sidebar option and four footer widget options.  In addition, this is the only theme with the Milestone Widget (also known as the Countdown Widget) which was made specifically as a “Save the Date” countdown for this wedding-centered theme.  Page-wise, it has the option to use parent pages – which makes for more organized pages.  Post-wise, it has the option to show four of your latest posts in columns on your blog’s home page.  Last but not least, it gives you the option to change the colour of links on your blog.

Screen Shot 2013-10-12 at 9.58.05 AM

Now let’s move onto the Pilcrow theme, which is an upgrade to the retired PressRow theme.  I’ll be mentioning details in the same order as the last.  The header is the first main thing noticed on a blog, so I’ll talk about it first.  This theme’s header is a bit smaller, with a size of 770×200 pixels.  There are two footer widget options and one sidebar option.  However, this theme is the only one that gives the blogger six different ways to arrange the sidebar widgets.  This blog theme gives four different options for the default colour scheme: light, dark, red, and brown. 

Screen Shot 2013-10-12 at 9.58.34 AM

Last but not least is the theme, Ever After.  This theme was originally designed by WordPress to be a wedding-centered theme, which is why it’s blog ornaments are subtly classy.  Ever After has a wider but thinner header, with the length and height listed as 870×210 pixels.  On one hand, the sidebar widget is unavailable to this theme.  On the other hand, there are four footer widgets available to use.  Just like Forever, this theme gives the blogger the option to use parent pages.  Unlike the other two themes, Ever After offers no specific theme options to edit and choose from for this theme.

Screen Shot 2013-10-12 at 9.57.57 AM

I hope this helps you all get a better idea of what the most popular themes are like!

~♥~

On another note, there is a new Autumn makeover up on BAA!  Tell us what you think!

Also, this month’s Alpha In Training is AliciaRiveraXO!  I definitely recommend checking out her blog!

Until next time . . .

xoxo, Leesh

How to Make a Stretch Header on FotoFlexer

Hello you wonderful bloggers! 

It’s Serena Miller here to show you how to master making stretch headers on FotoFlexer!

Let’s get started, shall we?

♡♡♡♡♡♡♡♡♡♡

First, you will have to look for a picture of your FC or a generic picture, and I usually get my images from WeHeartIt. The picture should have some sort of blurred background to it, since that is the easiest way to make a stretched header.

large

I’ll be using this picture for this demonstration. 

♡♡♡♡♡♡♡♡♡♡

Step 1: Go to FotoFlexer.com, and once it loads, click upload photo, which is located on the upper right side. (Note: It will take a couple of seconds to load).

Screen shot 2013-09-24 at 6.43.07 PMYour screen should look like this. 

Step 2: Click “Upload” once again, and select the image you would like to use for your header. Then, click “Open” once you have selected the image.

Step 3: Once you have uploaded your picture, click “Load Another Photo” which is located on the upper right hand corner

baastep3

Step 4: Click “Edit From My Computer” and choose the same picture that you currently have, then click “Open”. 

Step 5: Now that you have a dotted background instead of a plain white background, you can delete the extra photo that you have just uploaded. 

Step 6: Resize the picture so that it looks like that it could fit your theme. 

Screen shot 2013-09-24 at 7.13.22 PM

Your screen should look like this, now with the dotted background instead of the plain white background. 

Step 7: You should see a whole selection of editing your picture, that is just below the “Load Another Photo” as mentioned above. If you are not already on the “Basic” section, then click “Basic”. 

Step 8: Click “Copy Region”, and now, click at the upper left hand corner or upper right hand corner, whichever has more of a blurred background, and drag your mouse down. Make sure your little box that you have lines up on the top and bottom

Screen shot 2013-09-24 at 7.18.55 PM

Next, click “Copy Selected Area”. 

Step 9: Your screen should know show the piece that you copied from your photo, and your original picture. Now, click your image and drag it to the right a bit so you have room to stretch the copied piece. 

Step 10: Move the copied piece on top of the original picture, and stretch it over your original image using the side buttons on the copied piece. (Note: Once the copied piece is completely over your original image, stretch the piece a little more.)

Screen shot 2013-09-24 at 7.25.22 PM

Your screen should look like this!

Step 11: On the same bar that the “Basic” section is in, on the right side, click “Layers”, and then click “Push Back”.

Screen shot 2013-09-24 at 7.28.27 PM

Your screen should now look like this, with your original image showing now. 

Step 12: On the same bar where the “Basic” section is, click “Decorate” and then click “Erase”

baa2

Step 13: After you have clicked on “Erase” you should get a black dot. If you would like to resize the dot, then a scale should have appeared when you clicked “Erase”. Start erasing the background of the original picture, and do NOT erase the blur you created. Also, try not to erase the image of your FC, or of your generic image. (Note: You should resize the black dot when you need to erase small spaces.)

baa3

Ta da! The finished header! The picture of your FC or a generic image should stand out from the blurred background!

(Note: If you would like to add text, FotoFlexer has a lot of font choices! In this tutorial, I will be using “Discover Beauty”)

baatutorial

I hope you all try this tutorial for how to make stretch headers on FotoFlexer!

♡♡♡♡♡♡♡♡♡♡

Notices: 


Alpha In Training: AliciaRiveraXO


The results for the polls where you guys decided whether or not having MIA TCTC FC’s should be able to be claimed again are in…. And winning with 15 votes, you guys have decided to have MIA TCTC FC’s be claimable again! Below is a list of girls that the team of BAA girls have decided should be claimed again. 

Taylor Swift

Sarah Hyland
Miley Cyrus
Kylie Jenner
Dakota Fanning
Phoebe Tonkin
Acacia Clark
Claire Holt
Hayden Panettiere
Stefanie Scott
XX,
Serena Miller