

Hello dolls!
It’s CiaoFromClaire here to give you a tutorial on how to get your measurements of your header right!
Let’s get started!
♡♡
The first thing you will need is your header, of course. This header is one I made before I got the exact measurements for my blog’s theme, which is Forever.

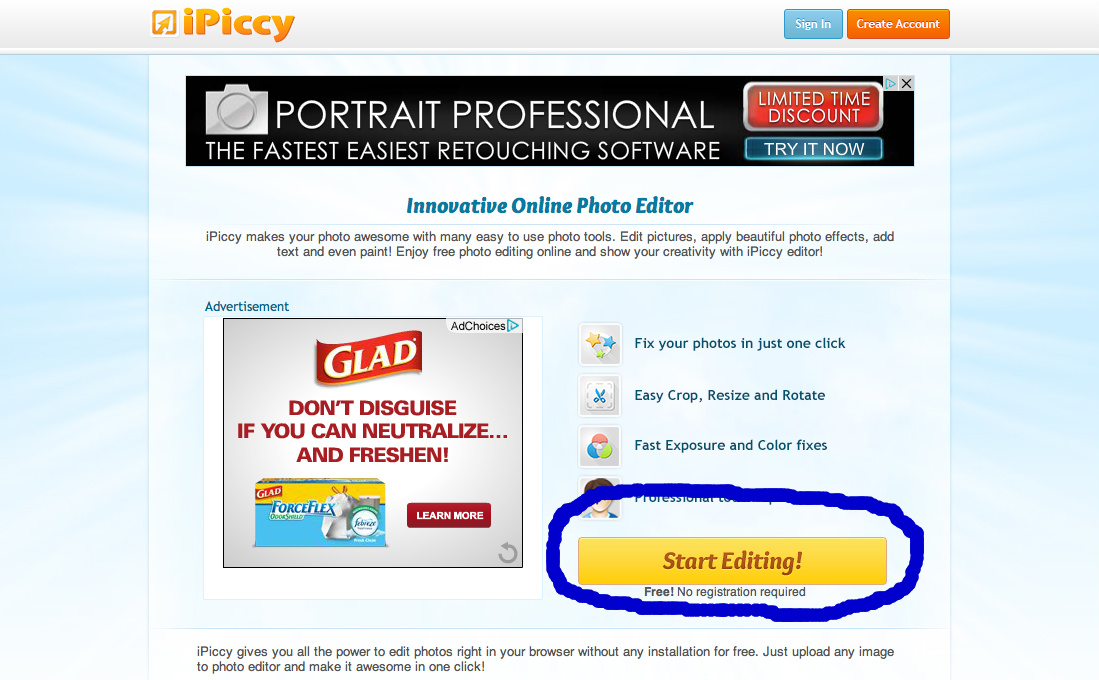
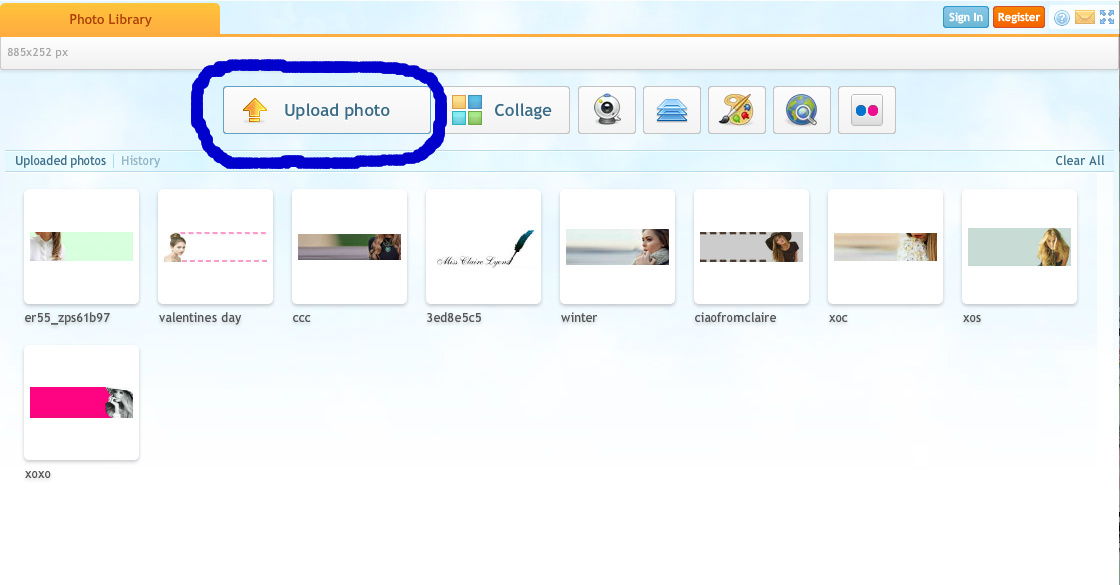
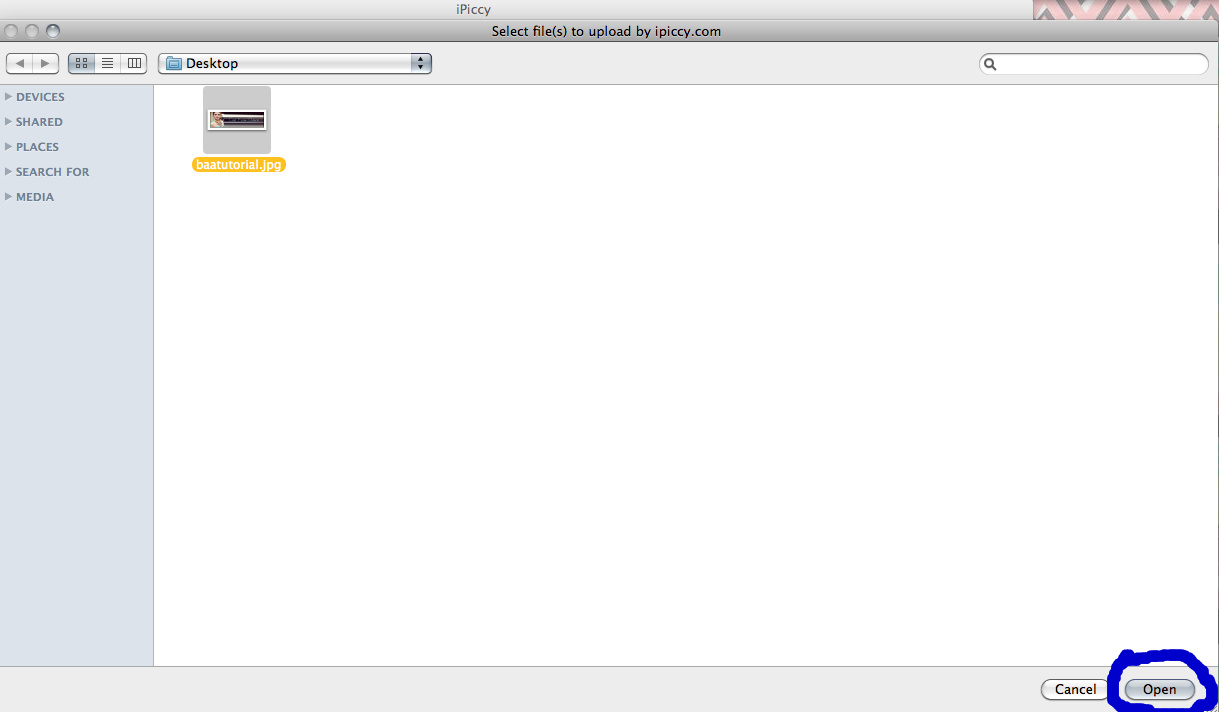
The next thing you need to do is go on iPiccy, and upload your header.
The next thing you have to do is click on the header, and when it’s blue, and next to the option where there is a camera, click “Create New Blend”.
It will then ask you for the measurements, and if you have the Forever theme, you will put 885 as the width, and 252 as the height! Once you have done that, click “Create!”.

Your screen will look like blank canvas, with a rectangle that will later have your header!
The next thing you have to do is click “Photo” and click your header, then drag your header into the rectangle!
Your header will look small, but that’s okay.


Taking your mouse to the bottom right corner of your header, click it, and then drag it all the way out until it fits your rectangle. Make sure that your header is on the inside of the header, and not on the outside. (Your header will look blurry in the process of dragging it out, but it will be normal once you stop holding the mouse.)
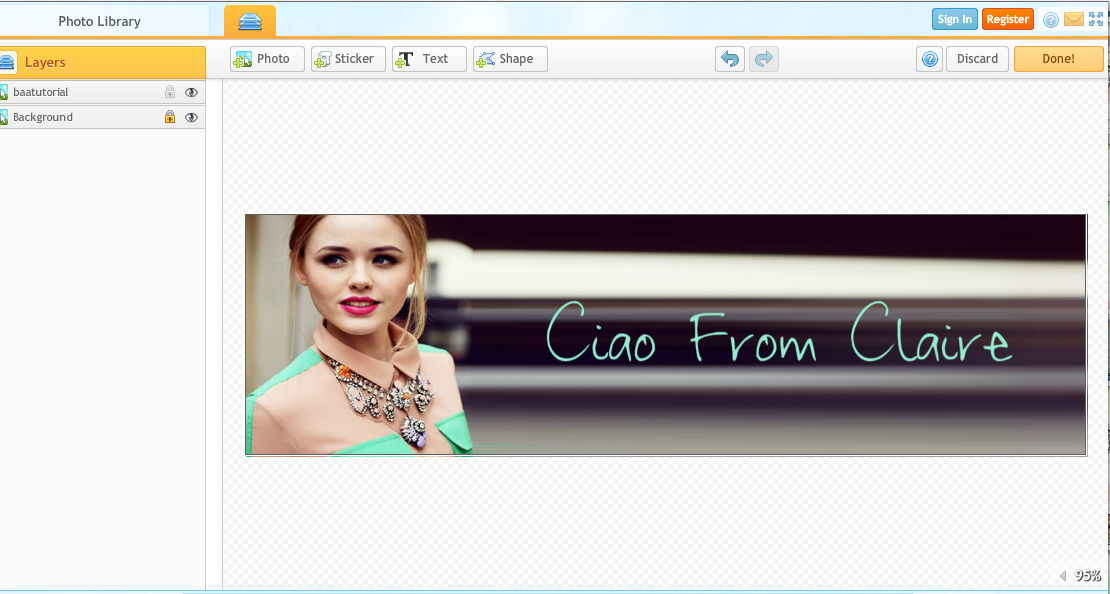
The finished product!
Now, all you have to do is save it! Click where it says “Done!” on the upper right corner, then click on the floppy disk.

Name your header, and then click “Save to my computer”. Your header will be saved on your desktop, and then you can go to your blog’s dashboard, and upload it on to your blog!
♡♡
I hope you guys enjoyed this tutorial, and make sure to get your header’s measurements right!
XOXO,
Claire.
